
1. Background
After coming home from the office, I was sitting on my couch, sipping a cup of coffee, and feeling quite tired. That’s when I heard my son asking me to get him some soaps shaped like animals. Since I’m always teaching him how to make things ourselves, I grabbed this opportunity and said, “Let’s do it ourselves.” Atharva was stunned and asked if this was really possible.
2. Planning and Shopping.
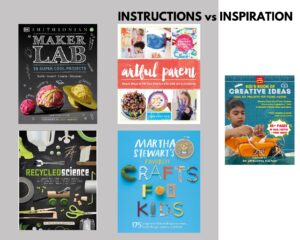
Not knowing how to make soap, I wondered if I had taken on an activity that was too big to realize. But after spending some time on YouTube, I realized it’s not as hard as I originally thought. With the commercial availability of melt-and-pour soap bases on Amazon and Flipkart, I soon felt it was something fairly doable.
I made a list of things we needed, which included:
- A good soap base (https://amzn.in/d/j5kL0a3)
- Essential oils (https://amzn.in/d/4Y8hoQX)
- Colorants (https://amzn.in/d/aICJNQi)
- Molds (https://amzn.in/d/digKTPs)
I ensured we had kettles and bowls for double boiling in the kitchen.
I was amazed by the variety of molds available online, and molds for making animal soaps were pretty cheap.
3. Execution.
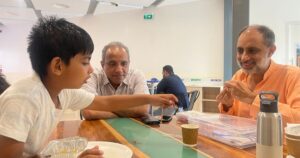
Soon after the shipments arrived home, on a Sunday morning, I spent time with Atharva explaining the steps to create soaps. He was eager to know more and had many questions, like why essential oils have no color and whether he could use them for other purposes.
He started opening the packages and cutting the soap base into smaller chunks. I was concerned about the sharpness of the cutter and warned him a couple of times, but he managed to cut the soap base into really good cubes.
Heating the soap base was my biggest fear, as we had to deal with fire. I asked him to take a back seat while I handled this part, but he insisted on participating. He sat next to the stove and gently followed my instructions. Soon, the soap base was liquefied.
We arranged the molds on another table, and I poured the hot liquid into the molds. I gave him the colors and essential oils to add. Being a bit naughty, he added more than I had instructed, but I didn’t want to spoil his fun.
4. Watching the Magic happen.
It was amazing to see Atharva’s excitement as he mixed the colors and chose the scents. We had a few spills, but they added to the fun and learning. Watching the soap harden was like waiting for a surprise to unfold.
He then wanted to gift these soaps to his grandparents, so I ordered molds that were oval in shape. We made another batch of soaps for the elders. This time, I wanted to teach him how to sell stuff. He started marketing his soaps and sold them for Rs.10 each, and the soaps were sold out in no time.
We hope you enjoyed this soap-making adventure! Try it out and share your creations with us. Stay tuned for next week’s activity where we’ll be exploring something new. It’s going to be a blast!
Don’t forget to subscribe to “Atharva’s Adventures” on YouTube for more fun activities.
5. Safety Tips for Soap-Making with Kids
- Supervision: Always supervise children closely when they are handling sharp objects or hot liquids.
- Protective Gear: Ensure kids wear protective gear like aprons, gloves, and safety goggles to protect their skin and eyes from hot soap and other chemicals.
- Safe Cutting: Use child-safe knives or cutters and teach proper cutting techniques to avoid injuries.
- Heat Precautions: Handle all heating elements yourself. Keep children at a safe distance from the stove and boiling water.
- Ventilation: Work in a well-ventilated area to avoid inhaling fumes from essential oils or heated soap bases.
- Clean Workspace: Keep the workspace clean and free of clutter to prevent accidents. Wipe up any spills immediately.
- Emergency Preparedness: Have a first aid kit on hand and know basic first aid procedures in case of minor burns or cuts.
6. Educational Tidbits About Soap-Making
- History of Soap: Soap-making dates back to ancient Babylon around 2800 BC. Early soaps were made using animal fats and wood ash.
- How Soap Works: Soap molecules have a hydrophilic (water-attracting) head and a hydrophobic (water-repelling) tail. This structure allows soap to emulsify oils and dirt, making them easier to wash away.
- Saponification: The process of making soap is called saponification. It’s a chemical reaction between fats or oils and a base (like lye) that produces soap and glycerin.
- Essential Oils: Essential oils are extracted from plants and used for their aromatic and therapeutic properties. They can have calming, energizing, or healing effects depending on the type.
- Natural vs. Synthetic Colors: Soap can be colored using natural ingredients like beet juice, turmeric, or spirulina, or synthetic colorants. Natural colorants are often preferred for their gentle, non-toxic properties.
- Soap Bases: Melt and pour soap bases are pre-made, allowing you to skip the lye handling process. Common bases include glycerin, goat milk, and shea butter.
- Biodegradability: Handmade soaps are often more biodegradable than commercial soaps, making them a more environmentally friendly choice.